Creating a Surface Texture
The very first thing we need to do is create the surface of the planet. There are a number of tools in the wild made specifically for this purpose, and a lot of them are completely FREE. Here is a list of a couple online planet surface generators:
I will cover different ways to make terrain in another tutorial, but for now just choose one of the tools from above! You do not have to worry whether the edges of the texture are seamless, but if you would like the texture to be used for 3D planets as well, then I recommend you use a seamless texture or a plugin that can make your texture seamless.
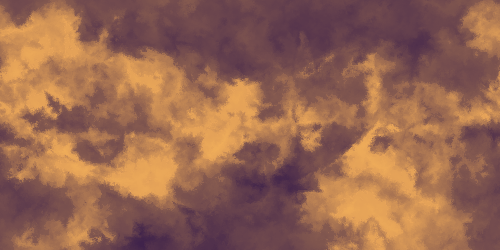
Planet Surface Generated with ‘Planet Map Generator’
Using one of the tools from above, I quickly generated and exported a nice random planet surface to use. There are a lot of different settings to play with and tweak to get different types of planets, or variations of the same planet type. To save yourself some time, you can also grab some premade planet surface textures from the completely free Planet Surface Texture Pack from Screaming Brain Studios!
GIMP: Map to Sphere
Now that you have a nice planet surface to work with, we need some software to help make it into a sphere! This is where our favorite free tool GIMP comes to the rescue. There is already a convenient built-in filter for converting a 2D image into a sphere, making this an incredibly simple process. First, load up your planet surface texture.

Planet surface texture loaded into GIMP
The image output size from this particular surface generation tool is a little bit too small, and a little bit odd, so I am going to resize it to the dimensions I would like my final planet to be. As a rule, I always stick with multiples of 4 (IE: 32×32, 64×64, 128×128, 512×512, etc.) to make things easier further down the road. For the sake of this tutorial, I’m just going to scale the texture to 512×512 since that is the largest I would like my planets to be. You can render a larger planet and then scale it down to smaller sizes without losing too much detail, whereas rendering smaller planets and trying to scale them to larger sizes can result in obvious distortions.

Resize the Texture to 512×512
This next step is a bit open ended, and you can always experiment with the settings to get different results. Head to the Filter menu and select the Map submenu to bring up a dropdown list of options. The one we are looking for is called Map Object. What this allows you to do is take an existing image layer and ‘wrap’ it to a 3D object, such as a sphere or a cylinder. This is how we are going to give the planet its curvy spherical appearance.

Planet Surface Texture Mapped to a Sphere
From the Map To: drop down menu, select Sphere to wrap the texture around a sphere. Make sure to tick the box next to Transparent Background if you would like to be able to use the planet as a sprite in a game project. Also make sure the box is NOT ticked next to Enable Antialiasing if you want the edges of the planet to be crisp and pixel perfect. Otherwise a smoothing effect will be applied where the edge of the planet touches the background.

Planet with Lighting Disabled
It is my personal preference when making these planets for Screaming Brain Studios to turn off any lighting effects so users can add their own later, but feel free to play around with the settings since there are a lot of different options here. You could mess around with the position of the sun or add shading to your planets if you want, but for this tutorial I am going to set the Lightsource Type to No Light from the dropdown menu.

Planet Scaled to Fill Canvas
The very last step is to increase the Z position on the Orientation tab. This will bring the planet closer and scale it to fill the size of the canvas. I use 0.95 as the value since it leaves several pixels of transparency around the edges of the planet. Once you are happy with the appearance and size of your new 2D planet, press OK to confirm your changes. Now just delete the background layer containing your original square texture and you will be left with a nice, neatly wrapped 2D Planet sphere with a transparent background you can export to whatever format you need.

Final Rendered 2D Planet
This method allows you more customization, as far as shading and rotation details, but depending on the texture you are using, it can create some unwanted distortion effects.
GIMP: Apply Lens
An alternate method to creating 2D planets in GIMP is to use the Apply Lens filter on your planet surface texture. This can be found in Filters -> Distorts and creates a similar visual effect, but has no lighting options. This is a much quicker method of creating simple 2D planets with reasonably pleasing results, despite being so simple. Again, you want to make sure you resize your texture to the size you want your final planet to be.

Planet surface texture warped with the Apply Lens filter
If you want the planet to have a transparent background, first you have to right click on the Layer containing your planet surface texture and choose Add Alpha Channel before you apply the filter. Now after selecting the Apply Lens filter, click on Background Color to bring up the color selection window and drag the Alpha slider all the way to the left (0). NOTE: You can also play around with the Blend Modes here to achieve different color effects.

Set the Alpha slider to 0
The resulting planet is very similar to the one from the first method, but gives you the flexibility of choosing how ’round’ you want to distort your planet texture, something you cannot quite do with the first method. All that is left now is to export your finished planet!

Final 2D Planet using the Apply Lens filter
This method does not give you very much control or customization options, but it is very quick to set up and churn out countless simple planets.
G’MIC: Circular Transform
Yet another method for creating 2D planets in GIMP is to use our favorite filter suite, G’MIC and a handy little filter called Cartesian Transform. If you have not downloaded and installed G’MIC, you should go ahead and do that now.
The first thing we want to do is load up our planet texture with GIMP. For this technique, we are going to cover a method you can use with textures that are a 2:1 scale (1024×512 or 512×256 for example), but it also works just fine with square textures.

2:1 Planet Texture
The next thing we need to do is crop our texture down to the area we would like to display. If you start with a square (1:1) texture, you do not have to do this part. You can use whichever method you wish, but for this tutorial, I am going to use Image -> Canvas Size. We want the texture to be one half the width, or equal to the height. So in the case of a 1024×512 texture, you would change the canvas width to 512, which will leave you with a square section of your planet texture.

Canvas Size Settings
I set the X Offset to -145 so that I am left with just the section of the texture that you see within the square frame. After you click Resize, you will see the resulting square section of our original planet texture. The only problem now is the size of the Layer is still the original width of our texture. Right click on the current layer and select Layer Boundary. All we need to do here is set everything to match the Canvas Resize settings from above. Change the width to 512 (Or the height of the texture you are using) and the X Offset to -145. Now your texture is ready to be transformed!

Cropped Planet Texture
Now to apply the magical transformation that will give us a great looking 2D planet! Go to Filters -> G’MIC Qt to bring up the filter browser. We are looking for a filter in the Deformations category called Cartesian Transform. You can type the name of the filter in the search bar to find it faster if you prefer.
By default, the Cartesian Transform filter will apply a wavy distortion effect to the texture, but we want to use some of our own math to turn the square texture into a round planet. First, make sure to turn off Relative Warping. Set the Interpolation value to Nearest Neighbor and the Boundary value to Transparent. Now for the weird part.
We only need math to affect the X-Axis of our texture, so change the value in the Y-Warping input to simply y. The formula we want to use to warp our texture into a circular planet is as follows:
r=w/2;R=sqrt(r^2-(y-h/2)^2);(x-r)/R*r+r
G’MIC allows for multiple expressions to be used in the same input, so the above formula is actually three separate expressions. I will not get into what is actually happening here, mainly because I have absolutely no idea. After countless months of digging and researching, this is the formula I was able to track down, so you will just have to bear with me. If you entered all the settings correctly, you should see something like the image below.

Cartesian Transform Applied to Texture
Make sure that you have entered the formula from above into the X-Warping input field, and the value y into the Y-Warping input field. This will cause the corners of the texture to warp inwards creating a circle.

X and Y Warping Values
Now you can press Apply and OK to confirm your settings and close the G’MIC browser window. The final 2D planet has been warped with mathematical precision, rather than using any guess work or imprecise scaling like the above methods.

Final Warped Texture
You are free to stop here if you like, but you may notice that only the corners of the texture have been warped inwards to the poles, but there is no curvature or depth to the middle of planet. Thankfully, GIMP has another convenient filter we can use here to make things a little bit more realistic. Go to Filters -> Distorts -> Spherize to bring up the Spherize filter. You can fiddle with the settings here to find something you like, but my personal settings are as follows:

Spherize Filter Settings
Set the Angle of View to 90 and the Curvature to 0.65 and press OK to confirm the filter settings. This will apply a nice rounding effect towards the center of the image and works a little bit differently from the Apply Lens filter we used earlier. You can also combine these two filters if you like, though it all just depends on your personal taste.

Final Spherized Texture
You can tweak the Curvature setting to get a more rounded appearance or change the Angle of View to increase or lessen the spherical effect. You can stop here if you prefer to add lighting or shading effects using in the game engine of your choice, or continue reading the next section of the tutorial to learn how to add 2D shading effects to your planet sprites!
Simple Shading
The final step is to add a little bit of shading, which will add an additional layer of realism or depth to our planet sprites. If you followed the method from the Map to Sphere section of the tutorial, then your planet sprites will already have lighting and shading applied to them. It is also possible to create variations of your planets with different lighting angles by adjusting the position of the light source in the Map effects dialog box. If you used the Circular Transform method from the second section of the tutorial, you likely have a flat unshaded planet sprite to work with.
First, we need to create a circular gradient. It may be easier to simply right click and save the example shading gradient below than making your own, but depending on your needs or the size of the sprites you wish to make, you may need to create one that is the same size as your planets. For this tutorial, I will be using the following circular gradient which matches the exact size of our unshaded planet.

Circular Gradient
You may need to create a different sized gradient if you are using different sized planets, but for the sake of this tutorial, I am going to use a 512×512 gradient and a 512×512 planet. Copy and paste the gradient to a new layer above the planet layer.

Paste the Gradient above the Planet Graphic
Now we need to change the layer Blend Mode to something other than Normal so the two layers are blended together. You are free to choose the blend mode that looks best to you, but I tend to prefer Grain Merge for the best results. You can read more about Grain Merge in the Blending section of the Isometric Lighting Tutorial if you would like to learn more about how it works.

Blended Layers
Now the two layers are properly blended together creating a rather convincing shaded sphere! If the shading is too dark, try adjusting the layer’s Opacity slider until you get a result you are happy with. In most cases, I have found that an Opacity value of around 80% gives a nice shading effect without too much darkening around the edges of the planet.

Final Shaded Planet Sprite
There are a lot of different planet surface generators available for free online, and even methods to create your own planet surfaces using other tools. But that is another tutorial for another day! Meanwhile, you can already grab a whole bunch of FREE premade 2D Planets and Planet Textures from Screaming Brain Studios to experiment with!